Even though we try really hard to make sure your imported music library is magically, perfectly listed, the reality is there is some possibility of snags along the way. Never fear though! We’ve made it easy for you to edit the artist, album, or track information to correct it.
We’ll go through some examples in this article for how to correct various things.
Editing Artist or Album Titles
So, you’ve got an album of Carl Orff’s wonderful scenic cantata “Carmina Burana” in your library. Unfortunately, it actually got scanned in under an artist named Carmina Burana instead of Carl Orff.
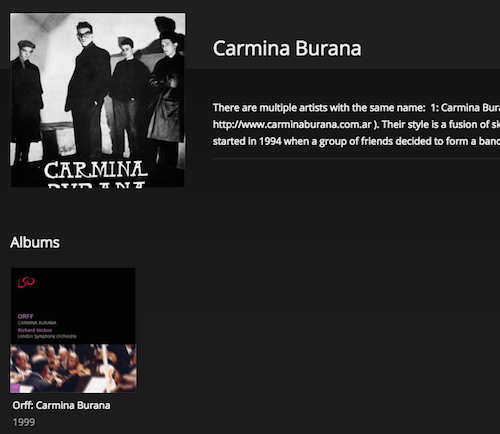
Thankfully, this is easy to fix: we just have to update the metadata for the ‘Album Artist’.
Enter the album and then choose the Edit icon in the top actionbar or type the E keyboard shortcut to open up the edit window.
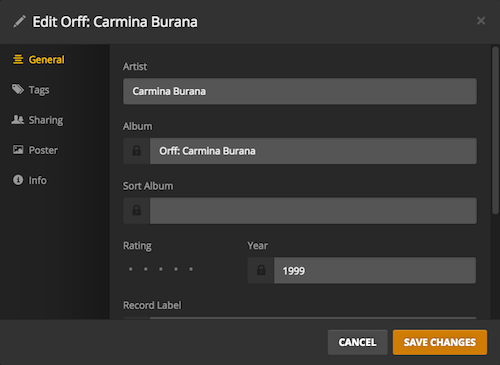
Replace the current value with Carl Orff and then save the changes.
Go back to your library, and you’ll see a new “Carl Orff” entry in the library, but it might be blank.

To populate it, we just need to enter that artist and then do a regular Refresh in the top actionbar. In just a few seconds, you’ll have everything all set!

Related Page: Scanning vs Refreshing a Library
Merge Albums
Let’s assume you have a copy of Pink Floyd’s classic album, “The Wall”. Unfortunately, it’s listed as two separate albums in your library, even though it should just be two discs of a single album.

This is easy to fix. Let’s start by assigning all the tracks in the first disc to Disc 1. Later, we will add the tracks from Disc 2.
Go to the first disc (the first album entry, in this case) mouse over the first track, and select ![]() . That turns on multi-select mode. Select all of the tracks for the disc.
. That turns on multi-select mode. Select all of the tracks for the disc.
Tip!: You can select the first track, hold down SHIFT, then click the last one to select them all at once.
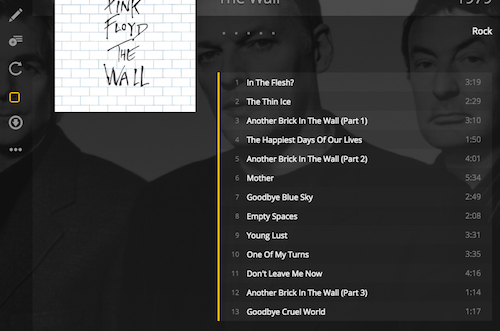
To edit all of those tracks at the same time, choose the Edit icon in the top actionbar or type the E keyboard shortcut to open up the edit window.
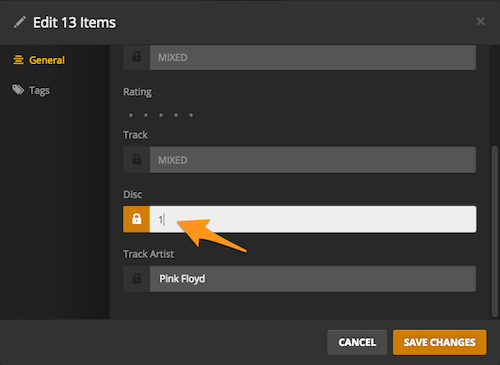
Scroll down and set these tracks as part of Disc 1, then save the changes.
Now, back out and enter the “disc 2” album. Do the same thing to multi-select and then edit the tracks.
This time, we’re going to start by reassigning the album name to the same one we used first. Highlight the Album field and assign it to the same name as Disc 1, in this case “The Wall”. Some cool autocomplete actions should appear as you type to help you avoid typos.
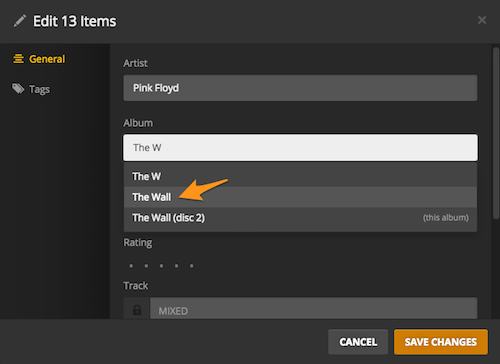
Select that entry to populate the field. Then go set the tracks to be part of Disc 2 and save the changes.
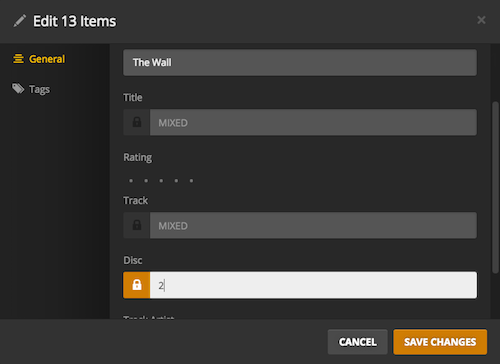
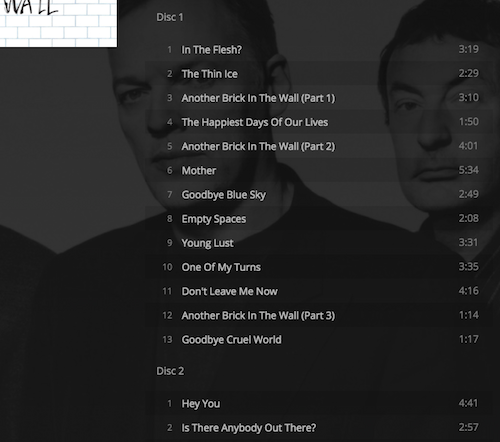
Once you save, you’ll see the tracks disappear on you. That’s because they’re now associated with the correct album! Exit out and you’ll see there’s now only a single album listed, which contains both discs.
Split Tracks (Multi-Disc, etc.)
Hmm, it looks like my multi-disc album of a local, live performance didn’t get split into multiple discs correctly.
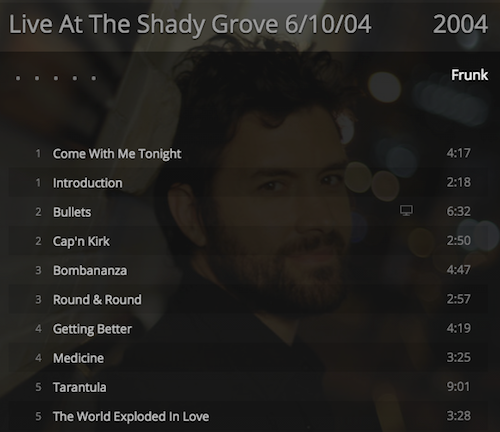
Luckily, assigning the tracks to the correct disc is a snap! In this case, it appears that all the tracks are set as “Disc 1”, so that just needs to be corrected.
Mouse over the first track, and select ![]() to turn on multi-select mode. Select the individual tracks that should be part of “Disc 2”.
to turn on multi-select mode. Select the individual tracks that should be part of “Disc 2”.
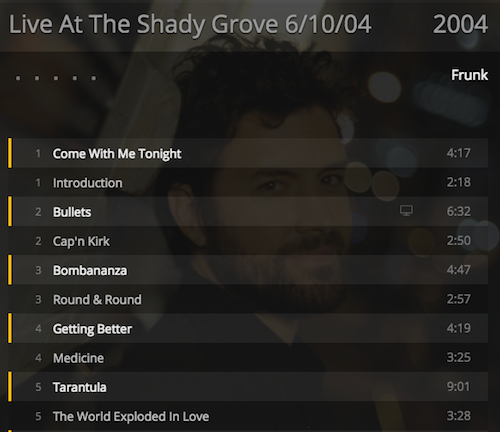
Choose the Edit icon in the top actionbar or type the E keyboard shortcut to open up the edit window.
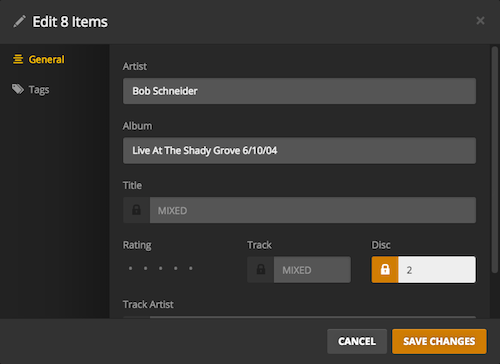
Set the tracks to be part of Disc 2 and save the changes.
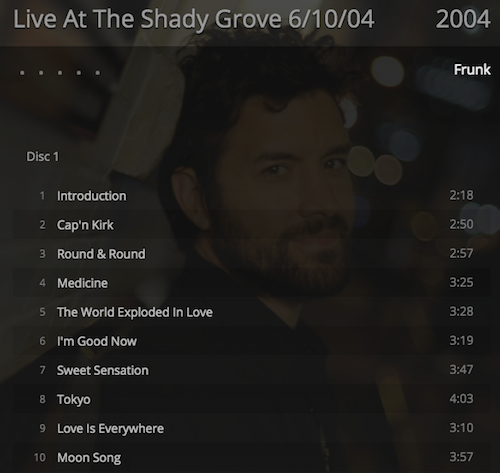
All better now!
