Tip!: You must have your compatible tuner & antenna connected to your Plex Media Server to be able to tune over-the-air broadcasts. The ability to record broadcasts (e.g. DVR) is a premium feature and requires an active Plex Pass subscription.
It’s easy to set something to record. When browsing the Program Guide, all you need to do is open the item (a movie, show, episode, sporting event, etc.), click the Record button, then adjust any necessary settings before confirming the recording. Setting up recordings is supported in the following Plex apps:
- Amazon Fire TV
- Android (mobile)
- Android TV
- Apple TV
- iOS
- Plex Web App
- Roku
Note: Ensure the computer / NAS the Plex Media Server runs on does not sleep / hibernate or turn off the disks or go into power save for the network interfaces. Plex Media Server will not bring the system out of sleep to start a scheduled recording.
Related Page: Program Guide
Movies
Once you’ve found a movie you’re interested in recording, open the preplay/details screen for the movie.
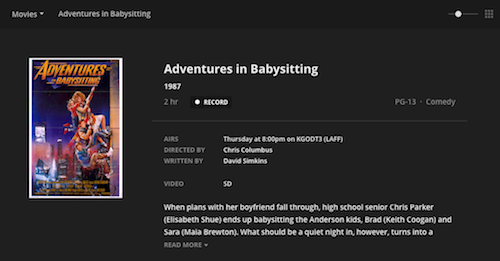
You can then use the Record button.
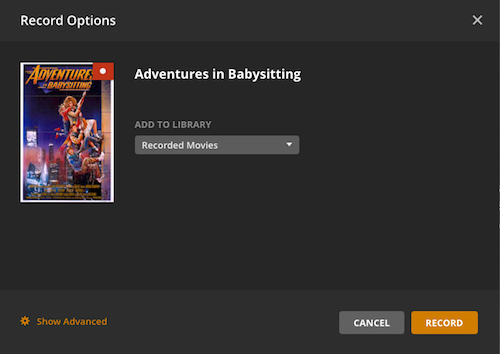
You can choose to which movie library you wish to add the recording.
Shows, News, Sports
Television shows, news programs, and sporting events are all treated as episodic content. If you open the main series, you can see details for it along with all episodes/events that are part of it.
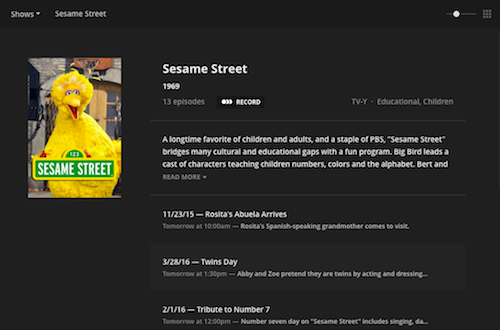
Choosing to record a show lets you control which episodes of that show will be recorded.
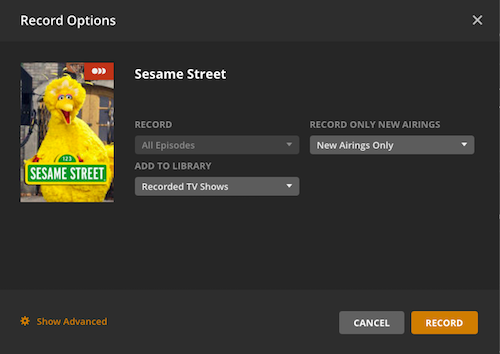
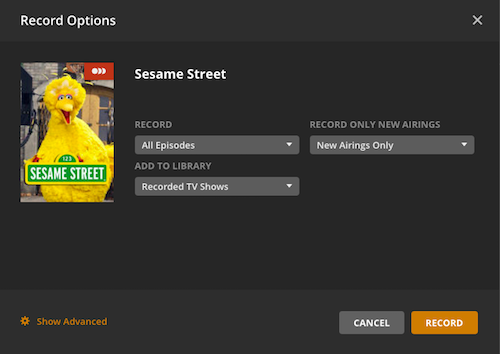
You can choose whether to record “New and Repeat Airings” or “New Airings Only”. You can also choose to which television library you wish to add the recording.
You can also view a specific episode or event.
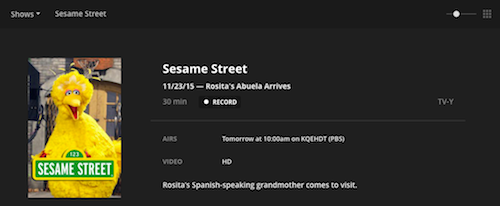
Choosing to record the episode provides additional options.
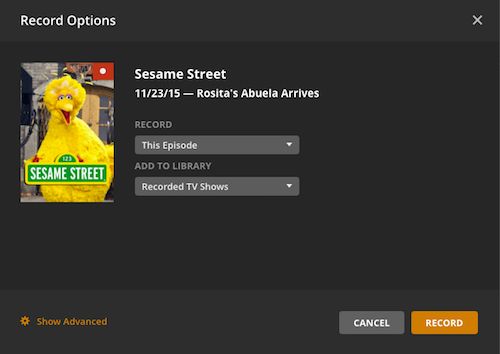
You can select whether you want to record only that specific episode or all episodes. Similarly, you can choose to which television library to add the recording(s).
If you choose All Episodes, you can further specify whether to record “New and Repeat Airings” or “New Airings Only”.
Conflicts
You’re likely to eventually run into a situation where you don’t have enough tuners to record a new item you set up. When you try to set up a recording that conflicts with existing recordings, you’ll see a Conflict Detected window.
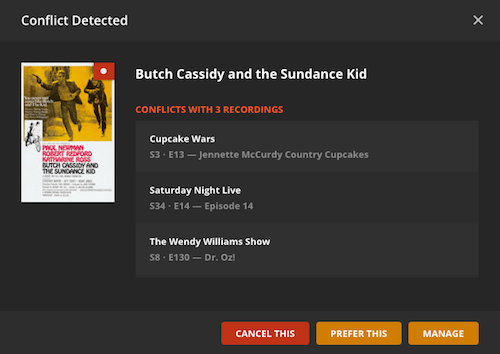
The window will show you what other items the new recording would conflict with. You then have choices:
- Cancel This – Choose not to schedule the recording at all.
- Prefer This – Choose to prefer this recording, which moves it to the top of the Recording Priority list.
- Manage – Take you to the Recording Schedule page, where you can view scheduled recordings and manually adjust the Recording Priority.
Related Page: Manage Your Recordings
Advanced Recording Options
When you have a Recording window open, you can click Show Advanced at the bottom to set more advanced options. Most users won’t need to do anything with these very often.
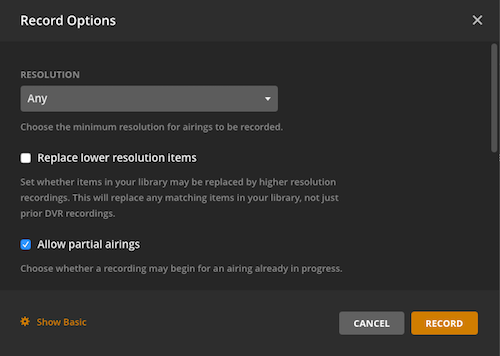
Tip!: The advanced options available here can vary depending on what type of content recording you’re setting up.
Resolution
Select the minimum resolution to use for recorded airings. Available options:
- Any
- HD only
For instance, if you select HD only, then an episode that airs in SD will not be recorded, even if it is for the selected show.
Replace lower resolution items
If enabled, then items in your library can be replaced if the new recording is a higher resolution.
Note: This can replace any matching items in your library, not just prior DVR recordings.
Allow partial airings
Choose whether a recording may begin for an airing that is already in progress.
Minutes Before Start
Start the recording early. Specify the number of minutes before the scheduled airing time to start recording.
Minutes After End
Keep recording after the scheduled end time. Specify the number of minutes after the scheduled airing time to end recording.
Limit to Channel
Choose whether you wish to restrict recordings for this program to a specific channel. Available options:
- Any
- <Specific channel with that program airing>
Keep
Set the maximum number of unwatched episodes to keep for the show. Available options:
- All episodes
- 5 episodes
- 3 episodes
- 1 episode
- Episodes from the past 3 days
- Episodes from the past 7 days
- Episodes from the past 30 days
Examples:
If you choose “3 episodes” and you currently have 3 unwatched episodes, then when a new episode gets recorded, the oldest existing episode will automatically be removed.
“Episodes from the past X days” refers to when an episode first aired. So, if you record the nightly news and choose “Episodes from the past 7 days”, then after the 7th day, older unwatched episodes would start being removed. Conversely, if you have that setting chosen and you record a repeat airing of an episode that initially premiered a year ago, the episode would not be retained at all (since it was first aired more than 7 days ago).
Tip!: You should really only use the “Episodes from the past X days” options for shows where you’re only interested in retaining _current_ episodes.
Delete Episodes After Watching
Choose how quickly episodes are removed after the server admin has watched them. Available options:
- Never
- After a day
- After a week
For any setting except Never, episodes will automatically be deleted X number of days after the server admin account has watched them.
Warning: This is based on the server admin account. If this value is set and the server admin watches an episode, it will be deleted after X days even if a shared user has not watched it.
Manage Your Recordings
Once you’ve set up some recordings, you can manage them. That allows you to edit settings, adjust priority, or resolve recording conflicts.
Related Page: Manage Your Recordings
